


Okay, I've been asked by several people to post a how-to on making Kombucha. So....into the kitchen!
These instructions will make 68oz of Kombucha to drink. (You'll need to hang on to 12 ounces as the starter tea for your next batch)
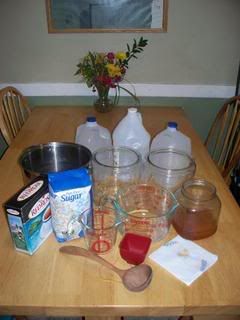
What you will need:
-Stainless steel pot
-Glass jar to brew in (size will depend on amount you plan on making)
-Black tea (5 tea bags)
-Plain white sugar (1 cup)
-Spring water 80 ounces + some for evaporation (tap is fine but if you live in the city like I do, you have to worry about chlorine.)
-Glass or plastic measuring cups
-Kombucha Scoby with 12 oz (or 1 1/2 cups) starter tea.
-Paper towels (or paper napkins)
-Big rubber band
-Vinegar to help sanitize utensils, jars, pan etc.

We start off by washing everything thoroughly. (Rinse really well as soap will kill the Kombucha.) Then splash some vinegar on or in each of the things that will be in contact with your Kombucha. Remember...no metal! You are going to pour at least 80oz (10 cups) of water into your pot to heat. I always add an extra few ounces to cover any evaporation.) I am doubling this whole recipe/process so I have much more water in my pot 

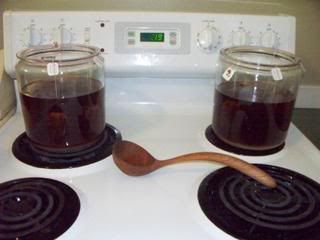
While the water is heating, get your brewing jars ready. (I bought my jars for around 7$ a piece at Wal-mart. I have 4 so I can always have 2 jars brewing, and 2 more ready to go) You need 5 tea bags. I usually suspend them from the sides and then wrap a rubber band around the edge so they don't fall when I pour the hot water in.

Here's my assistant photographer....
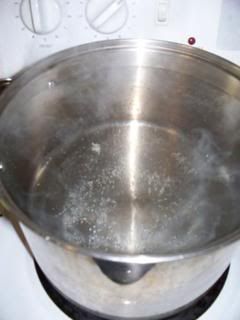
If you are using spring water (or good well water) heat it until it's just about to boil. (If you are using tap water, you'll want to bring your water to a boil and leave it boiling for at least 10 minutes to get rid of the chlorine. Make sure to add plenty of water to allow for evaporation!)
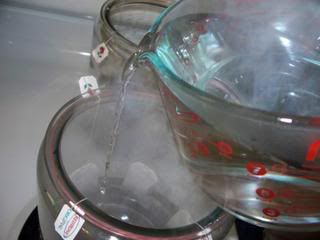
Measure out your 80 ounces(10 cups). Pour the measured water into your waiting jar. 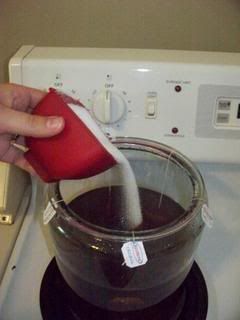
Wait 5 minutes and then pour in your sugar. (This can be a bit tricky...if you pour it in too soon, the sugar can carmelize...if you wait too long it may not dissolve. 5 minutes is usually safe!)
Let your tea steep for about 20 minutes. 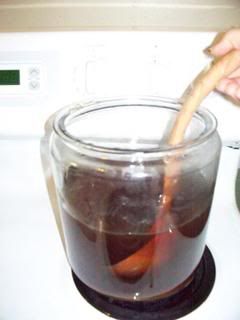
Then take out the tea bags and give the sweet tea a stir. We want all of the sugar dissolved and distributed.
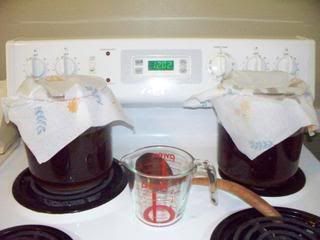
Cover your tea and let it sit until cooled to room temp. (Feel the jar, if it feels cool, it's probably okay...if it's still warm, leave it alone! This usually takes several hours.)

The realtor called while I was waiting for the tea to cool and my lovely photographer thought it would be funny to take a picture.....

While the camera's out.....here's my little monkeys!

And me....
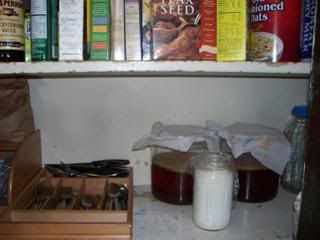
The tea has cooled and now it's time to transfer my scoby's to their new home. This is where they "live". I keep one corner of my pantry for brewing and fermenting (As you can see...there's also some kefir in there right now...)

Your next step will be to remove 12 ounces (or 1 1/2 cups) of sweet tea from your jar. (This will allow room for the starter tea and keep the total amount the same so you have the same ratio...more on that at the end) You can drink this tea if you want...I personally dump it down the drain as I don't care for sweet tea
Now you are going to take 12 ounces (1 1/2 cups ) of starter tea....
and put it in your fresh batch of sweet tea.
(The starter tea is put in to get the ph level of the tea off to a good start....which is necessary to avoid mold. A note on mold...if after watching for several days and you are sure your kombucha scoby is growing mold...looks like what you'd see on bread....throw it out, sanitize your jars and start over. Mold isn't anything to mess around with in this case. I try to keep a backup scoby with starter tea in the fridge...just in case!)

Next you're going to go remove all jewelry/watches and wash your hands again...rinse them very well (I even splash vinegar on my hands) Carefully take your scoby....

and slip it into it's new home of sweet tea.
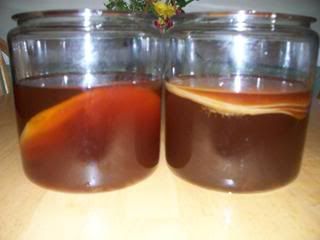
Here they are in their new homes! The one on the right shows the layers of babies on the scoby. Also, note how they can go sideways....it's totally normal for them to float on the top, on their sides or even rest on the bottom. Mine usually make their way back to the top (They actually have now...24 hrs later)

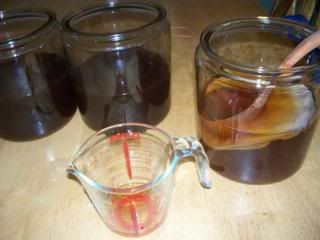
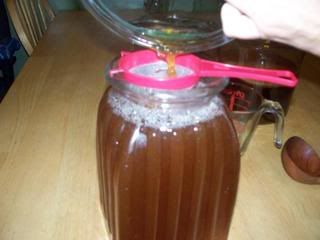
Now it's time to strain this past weeks brew into the pitcher. (I always strain it as I pour it into the pitcher and then again as it goes into the glass. There are little brown globs of spent yeast etc. and though it wouldn't hurt you ...might even be good....I personally don't care for texture in my drinks. Just remember you want a plastic or nylon strainer....no metal! :o)
You'll notice the bubbles...that's normal....kombucha is naturally carbonated!
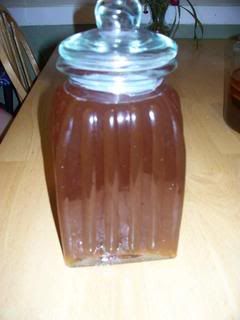
And here it is ready to go into the fridge. But before that.....

Salute!
Now for some more info...I us a 10-10-15% ratio when I make k-tea. Meaning 80 ounces of water-8 ounces of sugar-12 ounces of starter tea. Once you are experienced at making kombucha, you can play with these numbers a bit but this is what I use. If you are starting out with for the first time, you can start with 32 ounces of water-2 tea bags-3.2 ounces of sugar and-4.7 ounces of starter tea. If you want to make a bigger batch than you have starter tea for, you can add distilled vinegar (white, apple cider or white wine), to make the amount needed. (Some people say you can use just vinegar on occasion as a starter if you have somehow run out of regular starter tea.)
Places to get scoby's and starter tea...from friends or family if possible! With every brew you'll have a new baby that can either be kept together or passed along (I've already gotten several family members going on k-tea from my "babies") If you need to purchase them, there are several places on-line you can buy from and there's several sellers on E-bay. I have had excellent luck with this seller and you can also purchase strainers etc. from him. (Hi Mike!) He also has a wonderful website with additional info here.
I hope you've enjoyed this how-to on making kombucha and though I am by no means an expert, please feel free to ask any questions you may have! Kombucha is such a wonderfl, healthy and frugal (when made at home) drink for your family...it's worth the time and trial & errors!
3 comments:
Hi... I gotcha... I will fix the link first thing... beautiful pages ... all the best BacteriaPimp
I'm type II Diabetic how sweet is this tea? can diabetics drank it?
If you decide to try it, just keep a close eye on your sugar levels :)
My stepmother is a diabetic (type 1) and she's a kombucha enthusiast. I believe she brews hers for 10-14 days (the longer you brew the kombucha, the less sugar is left in the tea...the scoby has more time to metabolize it)
If you are in doubt, check with your doctor ;)
Post a Comment